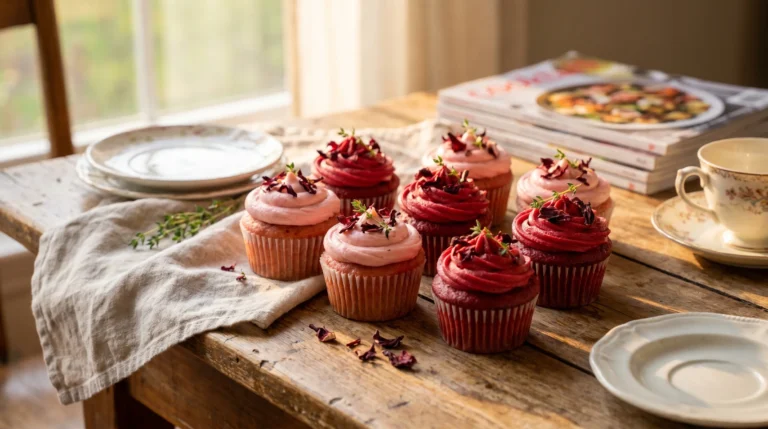
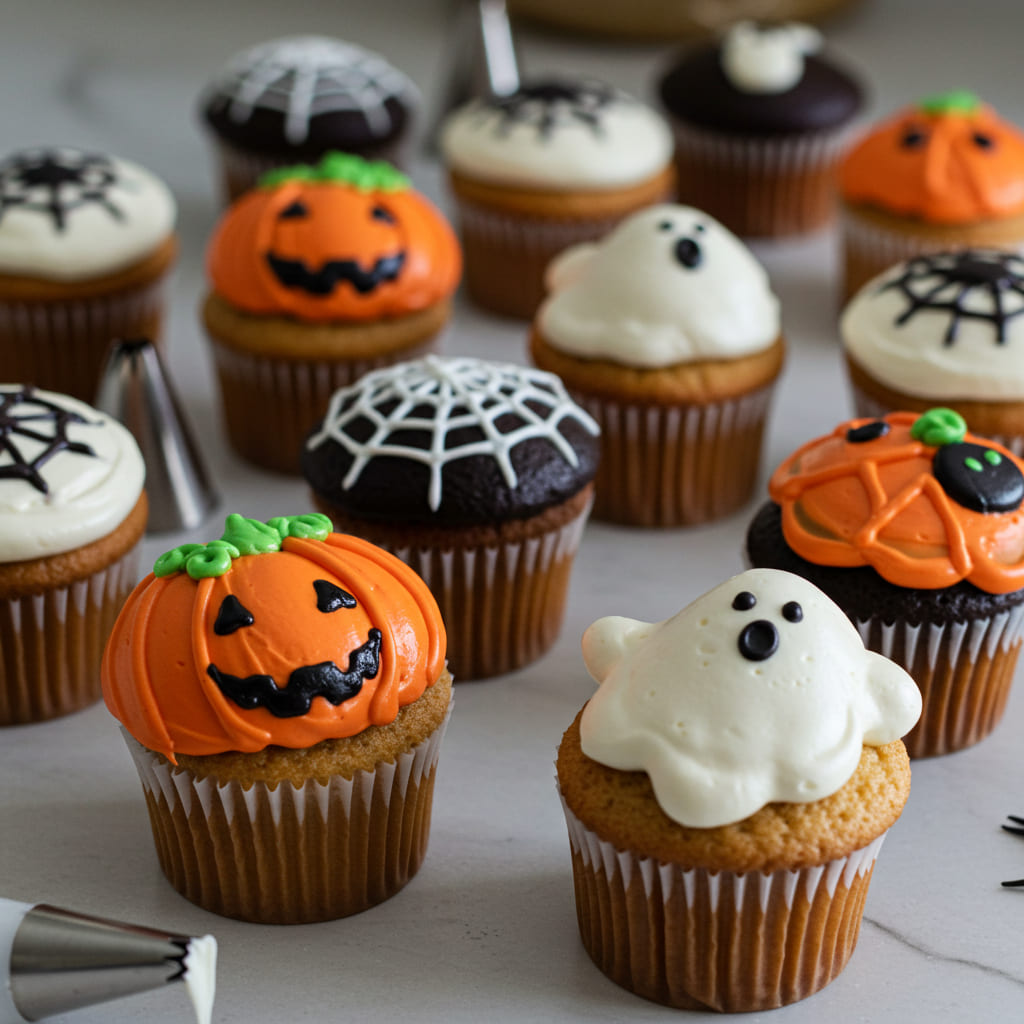
Genius Halloween Piping Tips for Effortless Spooky Cupcakes
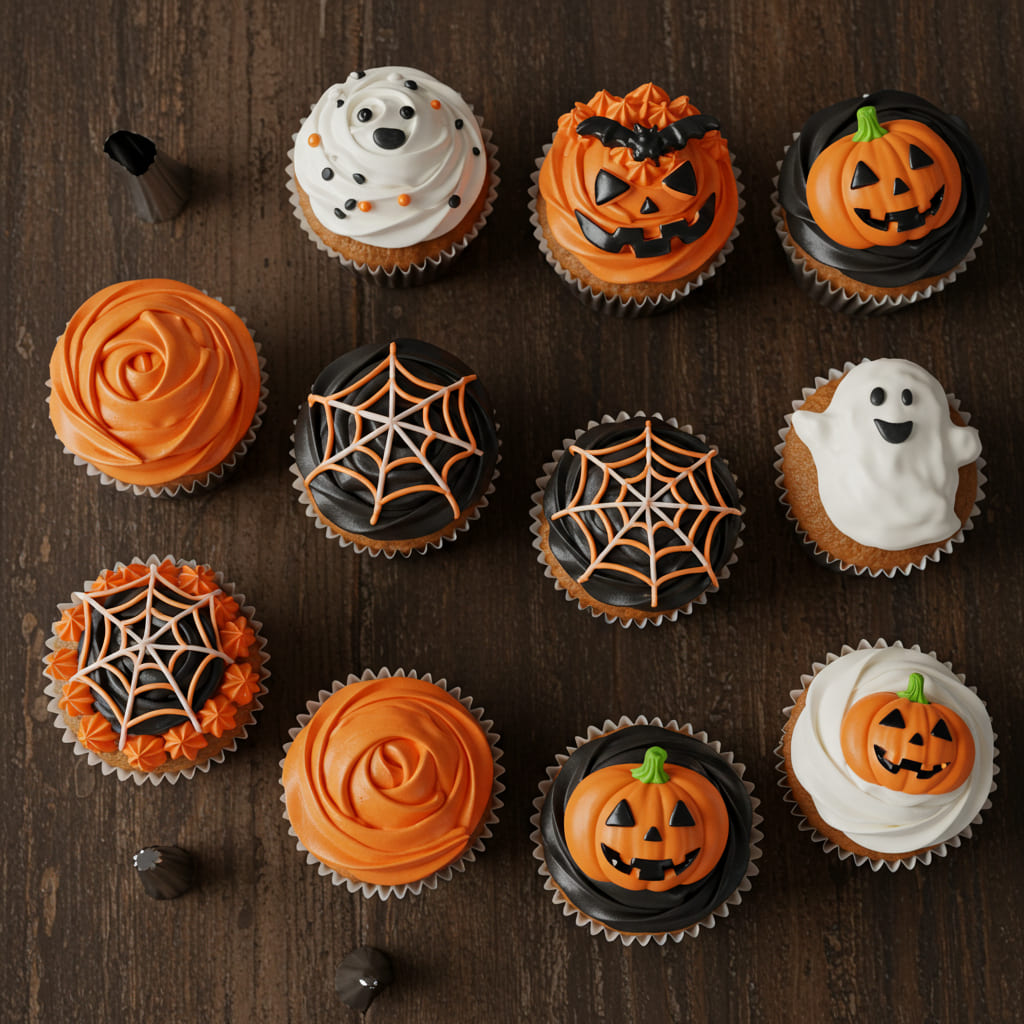
Table of Contents
I used to think Halloween piping tips were just for professional bakers with steady hands and zero fear. Then I ruined three batches of cupcakes trying to pipe a simple spiderweb. The truth hit me like a dropped mixing bowl: I was overcomplicating everything.
The right Halloween piping tips can transform your treats from “meh” to monstrously good without a culinary degree. Forget the stress and embrace the creative chaos. This isn’t about perfection; it’s about having a blast and creating something deliciously spooky.
Let me show you how.
What’s the secret sauce? It’s not just about the shape of the tip. It’s about the sheer power you hold in your hand.
You can turn a plain buttercream blob into a crawling tarantula or a ghost with a cute little smile. Remember the joy of a perfectly decorated cookie as a kid? That’s the nostalgia we’re tapping into.
It’s underrated because people get intimidated, but IMO, that’s the best part. Conquering a new piping technique feels like a superpower. Who wouldn’t want to be the hero of the Halloween party?
Ingredients
Before we get to the fun part, let’s gather our arsenal.
You don’t need a ton of fancy gear, but a few key players will make all the difference. I promise, this is simpler than trying to untangle last year’s fake cobwebs.
- Your favorite buttercream or royal icing, stiff consistency is key
- A set of basic piping bags, disposable ones are a lifesaver for cleanup
- Couplers, so you can switch Halloween piping tips without needing a new bag for each design
- Piping Tips: Round tip (#12), Star tip (#21), Leaf tip (#352), and a specialty tip like a Grass or Spiderweb tip
- Gel food coloring in black, orange, and green
- A quirky but essential item: a tall glass to stand your filled piping bag in – it keeps everything tidy!
Step-by-Step Instructions
- Prepare your icing. Color your icing in separate bowls. A pro tip: use gel food coloring instead of liquid to avoid changing the icing’s consistency. You want it stiff enough to hold a shape but soft enough to pipe smoothly.
- Fit your piping bag. Place your coupler into the bag, then screw on the ring. Drop your chosen Halloween piping tip into the ring and screw it on tight. No one wants a tip flying off mid-ghost.
- Fill the bag. Stand your bag in a tall glass and fold the top down over the rim. Use a spatula to fill the bag about halfway with icing. Unfold the top, twist it shut, and squeeze out a tiny bit of air.
- Practice your pressure. On a piece of parchment paper, practice applying consistent pressure. For spiders, a round tip and a quick pull creates the body and legs. For a mummy, use a round tip and pipe squiggly lines. It’s all in the wrist!
- Decorate with confidence. Go for it! Pipe directly onto your cooled cupcakes or cookies. Remember, even “messy” designs look intentionally spooky. It’s Halloween, not a wedding.
Storage Instructions
You can absolutely prep your decorating arsenal ahead of time. Fill your piping bags with colored icing and store them in an airtight container in the fridge. They will stay fresh for up to 3 days.
For longer storage, you can freeze them. Place the filled bags in a freezer-safe bag for up to 1 month. Thaw overnight in the refrigerator before using.
This is a huge time-saving hack for party day.
Why You’ll Love This Halloween Piping Tips
- Total Crowd-Pleaser: The “wow” factor is real. Kids and adults alike will be amazed by your creations.
- Incredibly Versatile: Use the same few Halloween piping tips for cupcakes, cookies, cakes, and even brownies.
- Saves Your Sanity: Batch prep your icing and bags days before. On Halloween, you just grab and go, no last-minute panic.
Common Mistakes to Avoid
- Using runny icing. Your beautiful spider will melt into a puddle of sadness. Ensure your icing is stiff.
- Overfilling the piping bag. This is a guaranteed mess. Half-full is the sweet spot for control.
- Skipping the coupler. Trying to change tips without one is a recipe for disaster and wasted icing. Just don’t.
- Piping onto warm baked goods. Your art will slide right off. Always let everything cool completely.
Alternatives and Variations
Don’t have a specific tip? No problem!
A round tip can make spiders, webs, and writing. A star tip can create monster fur or witch hat textures. For dietary needs, these techniques work with any icing, including vegan buttercream or gluten-free royal icing.
Feeling fancy? Add edible glitter or spooky sprinkles to your designs for an extra pop.
FAQs
Can I freeze the decorated treats?
You can freeze cupcakes or cakes with buttercream decorations. Place them in a single layer in the freezer until solid, then transfer to an airtight container.
They’ll keep for about a month. Royal icing cookies freeze beautifully too.
What’s the best substitute for a grass tip?
If you don’t have a grass tip for creating monster fur or hair, a multi-opening tip (like a spaghettio tip) works well. Alternatively, you can carefully use small scissors to snip the ends of your piped icing for a textured look.
How long do piped decorations stay fresh?
Buttercream decorations are best enjoyed within 2-3 days when stored at cool room temperature.
For royal icing, they can last for weeks if kept in a cool, dry place, making them perfect for making ahead.
Is this kid-friendly?
Absolutely! Kids love helping with the decorating. Give them their own bag with a simple round tip and let them create their own monster faces.
It’s a fun, messy activity they’ll adore.
Can I prep the piping bags ahead of time?
Yes, and you should! Prepping your Halloween piping tips and bags a day or two in advance is the ultimate hack. It turns a chaotic decorating session into a smooth, enjoyable process.
Final Thoughts
Mastering a few simple Halloween piping tips is a game-changer.
It unlocks a world of creativity and makes your treats the star of the show. Don’t aim for flawless; aim for fun. Your slightly lopsided ghost will have more character anyway.
Now grab a piping bag and make some magic. I can’t wait to see what you create—tag me in your photos!

Ben is a 41-year-old baking educator and former bakery owner from Kansas City, Missouri. With a culinary degree and years of hands-on experience, he specializes in teaching approachable, science-based baking. He once recreated a 17th-century cupcake recipe for a historical food documentary.