Table of Contents
I used to think cupcake decorating was a talent you were born with. Then I ruined three batches in one afternoon. My piping bag exploded, my frosting melted, and my sprinkles looked like a sad craft project.
I almost gave up entirely. This ultimate cupcake decorating guide is the result of all those kitchen disasters. It’s the simple, stress-free blueprint I wish I’d had.
Forget complicated techniques; we’re focusing on flavor and fun. Your next batch is going to be your best one yet.
This isn’t just another list of tips. This cupcake decorating guide is built on the beautiful chaos of real life.
Remember your fifth birthday party? The cake was probably lopsided, but you loved it anyway. That’s the energy we’re bringing back.
Why should picture-perfect bakers have all the fun? I’ve stripped away the intimidation factor. We’re focusing on the joy of creating something delicious with your own two hands, even if it’s a little messy.
Ingredients
Before we start, let’s talk ingredients.
Using high-quality basics makes a world of difference. I’m not asking for anything wild, but a good vanilla extract is non-negotiable. Trust me on this.
Your taste buds will thank you later. Here’s your simple shopping list for classic vanilla buttercream.
- 1 cup (2 sticks) unsalted butter, at room temperature
- 4 cups powdered sugar, sifted
- 2-3 tablespoons heavy cream or whole milk
- 1 tablespoon pure vanilla extract
- A pinch of fine sea salt (the secret weapon)
- Gel food coloring (optional, but so much fun)
Step-by-Step Instructions
- Prep your butter. Your butter must be at room temperature. If it’s too cold, your arm will fall off from mixing. If it’s melted, you’ll have soup. The perfect consistency is cool but easily indented with your finger.
- Whip the butter. In a large bowl, beat the butter with an electric mixer on medium-high speed for 2-3 minutes. You want it to be pale, fluffy, and almost white. This step incorporates air, giving you that light, dreamy texture.
- Add the sugar gradually. This is the messy part, folks. Add the sifted powdered sugar one cup at a time on low speed. I put a kitchen towel over my mixer to avoid a sugar blizzard. Once incorporated, scrape down the bowl.
- Incorporate liquids and flavor. Add the vanilla, salt, and 2 tablespoons of cream. Beat on high speed for another 2-3 minutes until incredibly light and fluffy. If it’s too thick, add the remaining cream one teaspoon at a time.
- Color and pipe. If using gel color, add a tiny amount and mix thoroughly. Spoon your frosting into a piping bag fitted with your favorite tip. Practice a few swirls on a paper towel before committing to your beautiful, cooled cupcakes.
Storage Instructions
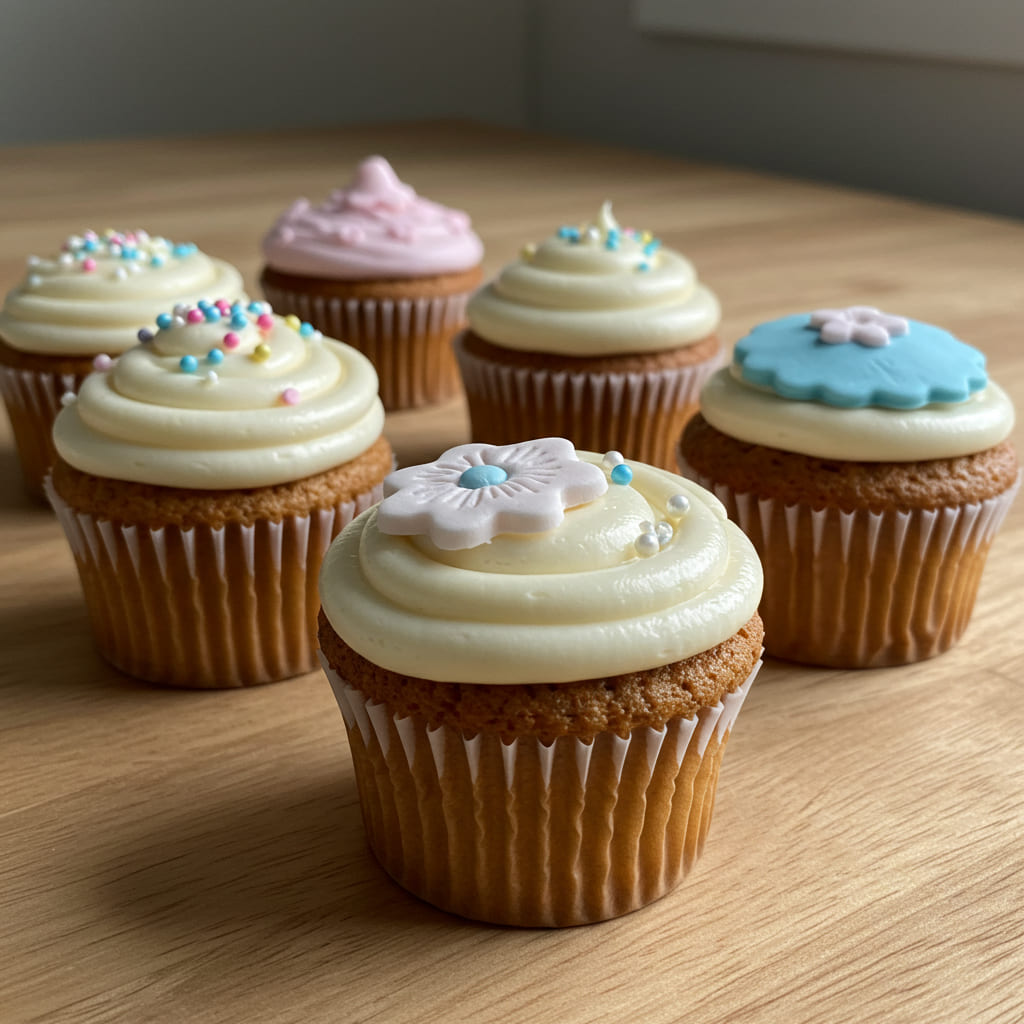
You’ve made this glorious frosting, now how do you keep it? For short-term storage, keep it in an airtight container in the fridge. It will last for up to one week.
For longer storage, you can freeze it. Scoop it into a freezer bag, press out the air, and freeze for up to three months. Thaw it overnight in the fridge and re-whip it before using.
This is a fantastic batch prep hack for last-minute treats.
Why You’ll Love This Cupcake Decorating Guide
- It’s Incredibly Forgiving: Made a mistake? Smush it down and start again. This method is built for real humans, not pastry robots.
- Total Crowd-Pleaser: Whether it’s a kid’s birthday or a office party, a beautifully decorated cupcake never fails to impress and delight everyone.
- Unlocks Creativity: Once you master the basic buttercream, the world of colors, flavors, and piping techniques is your oyster. It’s edible art.
Common Mistakes to Avoid
- Using cold butter. You’ll get a lumpy, gritty mess instead of smooth, cloud-like frosting.
- Skipping the sifting. I get it, it’s an extra step. But nobody wants a mouthful of powdered sugar lumps. Just do it.
- Overmixing after adding liquid. This can cause the frosting to break and become greasy. Mix until just combined and fluffy.
- Using liquid food coloring. This throws off your liquid balance and leads to sad, pastel colors. Gel coloring is the way to go for vibrant hues.
Alternatives and Variations
This basic formula is your playground.
For a dairy-free version, use high-quality vegan butter and plant-based milk. You can also swap the vanilla for other extracts like almond or lemon. For a chocolate version, add 3/4 cup of sifted cocoa powder when you add the powdered sugar.
Feeling adventurous? Fold in crushed cookies, sprinkles, or even a little fruit reduction after the frosting is whipped.
FAQs
Can I freeze decorated cupcakes?
Absolutely! Freeze them uncovered on a sheet pan until solid, then transfer to an airtight container.
They’ll keep for 1-2 months. Thaw in the fridge overnight.
What’s the best substitute for heavy cream?
Whole milk or half-and-half work in a pinch, but the frosting won’t be as rich or stable. For dairy-free, full-fat coconut cream is your best bet.
How long do frosted cupcakes stay fresh?
At room temperature, they are best enjoyed within 1-2 days.
If it’s very warm, store them in the fridge, but let them come to room temp before serving for the best texture and flavor.
Is this kid-friendly?
Are you kidding? It’s a cupcake decorating guide made for fun! Kids love choosing colors and, IMO, the messier the process, the better the memories.
Can I prep the frosting ahead of time?
Yes, and you should!
Making your frosting a day ahead actually allows the flavors to meld beautifully. Just remember to re-whip it before piping to bring back that fluffy texture.
Final Thoughts
This cupcake decorating guide is your ticket to stress-free, beautiful treats. I hope it brings you as much joy and confidence in the kitchen as it has for me.
Remember, perfection is overrated, but a delicious cupcake is forever. Now I want to see your creations! Tag me on social or leave a comment below telling me how your decorating adventure went.
Ben is a 41-year-old baking educator and former bakery owner from Kansas City, Missouri. With a culinary degree and years of hands-on experience, he specializes in teaching approachable, science-based baking. He once recreated a 17th-century cupcake recipe for a historical food documentary.


