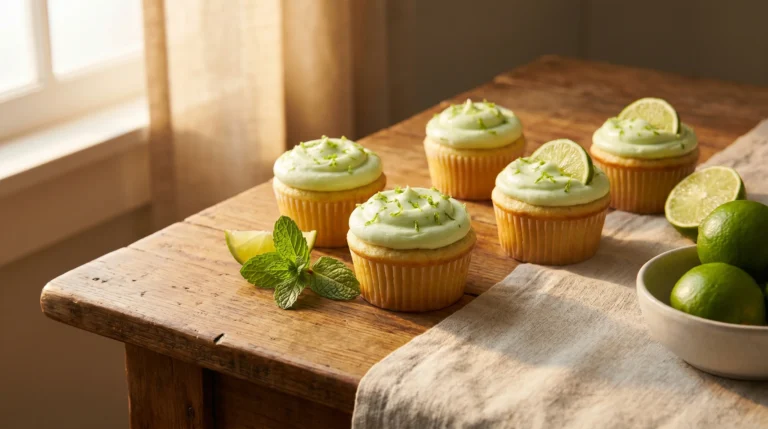
Best piping Christmas tree frosting
Mastering the art of piping Christmas tree frosting is the secret ingredient that transforms a simple cookie into a festive masterpiece. It’s the difference between a charming holiday treat and a Pinterest-worthy creation. This guide will walk you through every step, from choosing the right tools to creating perfect, fluffy branches. We’ll cover all the expert tips and common pitfalls to avoid. Get ready to elevate your holiday baking game with professional-looking results. Your cookie platter is about to become the star of the show.
Imagine the joy of presenting a tray of beautifully decorated Christmas tree cookies. The key to that wow factor is flawless piping Christmas tree frosting. This technique is easier than it looks with the right guidance. Let’s dive into the ultimate method for creating stunning edible evergreens.
The Ultimate Guide to Perfect Piping Christmas Tree Frosting in 2025
Creating beautiful piped trees is a blend of science and art. The consistency of your frosting is absolutely critical for success. If it’s too thin, your designs will slump and lose definition. If it’s too thick, you’ll struggle to pipe and your hand will cramp. The perfect texture is often called “medium peak” consistency.
This means the frosting holds a soft peak that gently curls over at the tip. Achieving this requires precise measurements and the right ingredients. Royal icing is the undisputed champion for this task due to its ability to dry hard. For more ideas, check out our guide on Cupcake icing ideas,Cupcake. For a deep dive into the fascinating history and science of this versatile icing, the Wikipedia entry on royal icing is an excellent resource. It covers its traditional uses and properties in detail.
Beyond consistency, your piping technique defines the final look. A steady hand and consistent pressure are your best friends. Practice on a piece of parchment paper before moving to your cookies. This builds muscle memory and confidence for the real deal.
Ingredients
Gathering the right components is the first step to piping Christmas tree frosting success. Using high-quality ingredients makes a noticeable difference in both flavor and performance. Here is your essential shopping list.
- 3 cups (360g) powdered sugar, sifted
- 2 large egg whites (or 5 tablespoons meringue powder + 10 tablespoons water)
- 1/2 teaspoon cream of tartar (helps stabilize peaks)
- 1 teaspoon pure vanilla extract (clear for white icing)
- Gel-based food coloring (green, plus optional colors for ornaments)
- Cookies: Your favorite sugar cookie recipe, cut into tree shapes
Instructions
Follow these steps carefully for flawless piping Christmas tree frosting every time. Patience during the mixing and coloring stages pays off with professional results. For more ideas, check out our guide on frosting color cupcakes,cupcakes. Let’s begin the decorating process.
- Prepare the Icing Base: In the bowl of a stand mixer fitted with the paddle attachment, combine the sifted powdered sugar, egg whites (or meringue powder mixture), and cream of tartar. Mix on low speed until combined, then increase to medium-high for 4-5 minutes until glossy and stiff peaks form. Add vanilla extract at the end.
- Divide and Color: Separate the icing into portions for different colors. For the main tree color, tint the largest portion with green gel coloring. Remember, gel color deepens over time, so go slightly lighter than your target shade. Keep a portion of icing white for snow and details.
- Adjust Consistency: This is the most crucial step for piping Christmas tree frosting. To achieve piping consistency, thin the colored icing with water, one teaspoon at a time, mixing thoroughly after each addition. Stop when the icing forms a ribbon that holds its shape for 10 seconds before melting back into the bowl.
- Prepare Your Piping Bag: Fit a coupler into a disposable piping bag. Attach a small round tip (like Wilton #3 or #5) or a small star tip for textured branches. Fill the bag halfway with your green icing, twist the top, and you’re ready to pipe.
- Pipe the Tree Outline: Start at the top of your cookie. Pipe a small star or dot for the tree topper. Then, working downward, pipe horizontal lines of “branches,” making each successive line slightly longer than the last to form the triangular tree shape.
- Add Details and Flood: Once your outline is set (after 10-15 minutes), you can flood the interior with slightly thinner icing or leave it as an outline. Use white icing with a very fine tip to add strings of lights, snow on the branches, or a simple trunk at the bottom.
- Let Dry Completely: Allow your decorated cookies to dry undisturbed for at least 8 hours, or preferably overnight. This ensures the piping Christmas tree frosting sets hard and is safe for stacking or packaging.
Pro Tips for Flawless Trees
A few expert tricks can take your decorating from good to incredible. First, always use gel or paste food coloring. Liquid dyes will throw off your icing consistency and make it too runny. Second, keep a damp paper towel nearby to cover your piping tip when not in use.
This prevents the icing from drying and clogging the tip. If your hand gets tired, simply set the bag down and take a break. Rushing leads to mistakes. For a “flocked” snowy tree effect, sprinkle white sanding sugar on the wet green icing. It adds wonderful texture and sparkle.
5 Revolutionary Benefits of Mastering This Skill
Learning the technique of piping Christmas tree frosting offers rewards beyond a pretty cookie. It’s a gateway to more confident and creative holiday baking. For more ideas, check out our guide on fall piping cupcakes,Cupcakes. The skills you build here are transferable to countless other designs.
- Creates Lasting Memories: Decorating cookies is a fantastic family activity. Kids love adding their own sprinkles and details, making it a cherished holiday tradition.
- Elevates Homemade Gifts: A box of professionally decorated cookies is a heartfelt, personalized gift that shows you care far more than a store-bought item.
- Builds Culinary Confidence: Mastering a technical skill like this boosts your overall baking confidence. You’ll start seeing other decorating projects as achievable challenges.
- Superior Taste and Quality: Homemade royal icing tastes better than most pre-made tubs. You control the flavor and sweetness, resulting in a more balanced treat. The texture and drying quality are also superior for packaging.
- Promotes Mindfulness: The focused, detailed work of piping can be a calming, almost meditative practice during the hectic holiday season. It’s a creative outlet that reduces stress. For more on the cognitive benefits of engaging in crafts, Psychology Today explores the mental health benefits of crafts in a helpful article.
3 Common Mistakes to Avoid
Even seasoned bakers can stumble. Being aware of these pitfalls will save you time and frustration. The number one error is incorrect icing consistency. Test it on the back of a bowl or a spare plate before you touch a cookie.
Another frequent mistake is overfilling the piping bag. Filling it more than halfway makes it difficult to control and increases the chance of messy blowouts. Finally, don’t skip the outline drying time before flooding. If you flood immediately, the outline can collapse, ruining your sharp edges.
Delicious Alternatives and Variations
If royal icing isn’t your thing, you have fantastic options. A thick buttercream frosting can be piped with a star tip for a fluffy, textured tree. It won’t dry hard but is delicious. For more ideas, check out our guide on sugar free apple cupcakes,Sugar Free. For a dairy-free or vegan approach, use aquafaba (chickpea liquid) instead of egg whites.
It whips up just like meringue. Get creative with your designs! Pipe a gradient tree using shades of green, or a whimsical pink and purple “gingerbread” tree. Use different sprinkle shapes as ornaments for added dimension and fun.
Frequently Asked Questions
What is the best piping tip for Christmas tree frosting?
A small round tip (Wilton #3 or #5) is perfect for clean outlines and delicate details. For a more traditional, textured “bough” look, a small open star tip (Wilton #16 or #18) creates beautiful ridged branches.
How far in advance can I make decorated cookies?
Properly dried cookies with royal icing can be stored in an airtight container at room temperature for up to two weeks. Separate layers with parchment paper to prevent sticking.
Can I use store-bought frosting for piping?
Most canned frostings are too soft for detailed piping work. You can try thickening them with extra powdered sugar, but for reliable results, homemade royal icing or a stiff buttercream is recommended.
Why did my green frosting turn brown?
Some green gel colors, especially those with a yellow base, can oxidize and turn slightly brownish over time. Using a “leaf green” or “forest green” color that has a blue base is more stable.
How do I fix icing that is too runny?
If your icing is too thin, simply add more sifted powdered sugar, a tablespoon at a time, and mix until it reaches the desired consistency. Be patient, as it can take a few minutes to thicken up fully.
What’s the trick for steady piping?
Rest your piping hand’s elbow on the table for stability. Use your other hand to guide the tip. Apply steady, even pressure and let the icing flow; don’t push or jerk the bag.
Can I add flavor extracts to royal icing?
Absolutely! Pure extracts like peppermint, almond, or lemon are wonderful additions. Add them sparingly (1/4 to 1/2 teaspoon) when you add the vanilla to avoid altering the icing’s consistency.
Final Thoughts
Piping Christmas tree frosting is a skill that brings immense joy and creative satisfaction. It turns a simple baking project into an artistic holiday endeavor. For more ideas, check out our guide on cupcake christmas decorations. With the right tools, consistent icing, and a bit of practice, you’ll be creating stunning cookies that impress everyone.
Remember, every expert was once a beginner. Don’t be discouraged by a few wobbly lines on your first try. The most important ingredient is the fun you have while doing it. For further inspiration and advanced cookie decorating techniques, explore the fantastic tutorials and community at Serious Eats. Now, gather your supplies, whip up a batch of icing, and start piping your way to a merrier Christmas!

Ben is a 41-year-old baking educator and former bakery owner from Kansas City, Missouri. With a culinary degree and years of hands-on experience, he specializes in teaching approachable, science-based baking. He once recreated a 17th-century cupcake recipe for a historical food documentary.