Table of Contents
Every year, I’d stare at those impossibly perfect Halloween cupcakes on Pinterest and feel a deep sense of inadequacy. My ghosts looked like sad marshmallows, and my pumpkins resembled orange blobs. Then I cracked the code.
The secret to how to decorate Halloween cupcakes isn’t artistic genius; it’s a few stupidly simple tricks. I went from bakery-level embarrassment to creating spooky masterpieces that actually look like what they’re supposed to be. Forget the stress, because this is the only guide you’ll need to slay your Halloween bake sale or party.
Why does this method for how to decorate Halloween cupcakes work when others fail?
It’s built for real people with limited time and questionable motor skills. We’re not using fancy piping tips you’ll use once. We’re using candy, sprinkles, and a little creativity.
Remember the feeling of sorting your candy haul as a kid? This process taps into that same nostalgic, playful energy. Who said adults can’t play with their food?
Ingredients
Before we get to the fun part, you need a solid base.
I use my favorite easy chocolate cupcake recipe because it’s moist and holds up to decorating. The real magic, however, is in the decorating arsenal. Raid the seasonal aisle at your grocery store; it’s a goldmine for this project.
- 12 baked & cooled cupcakes (your favorite recipe or box mix)
- 1 batch of vanilla buttercream frosting
- Orange, black, and green gel food coloring
- Candy eyeballs (non-negotiable for cuteness)
- Black decorating icing tube (for details)
- Oreo Cookies (for spider bodies)
- Pretzel sticks (for broom handles or spider legs)
- Halloween sprinkles mix
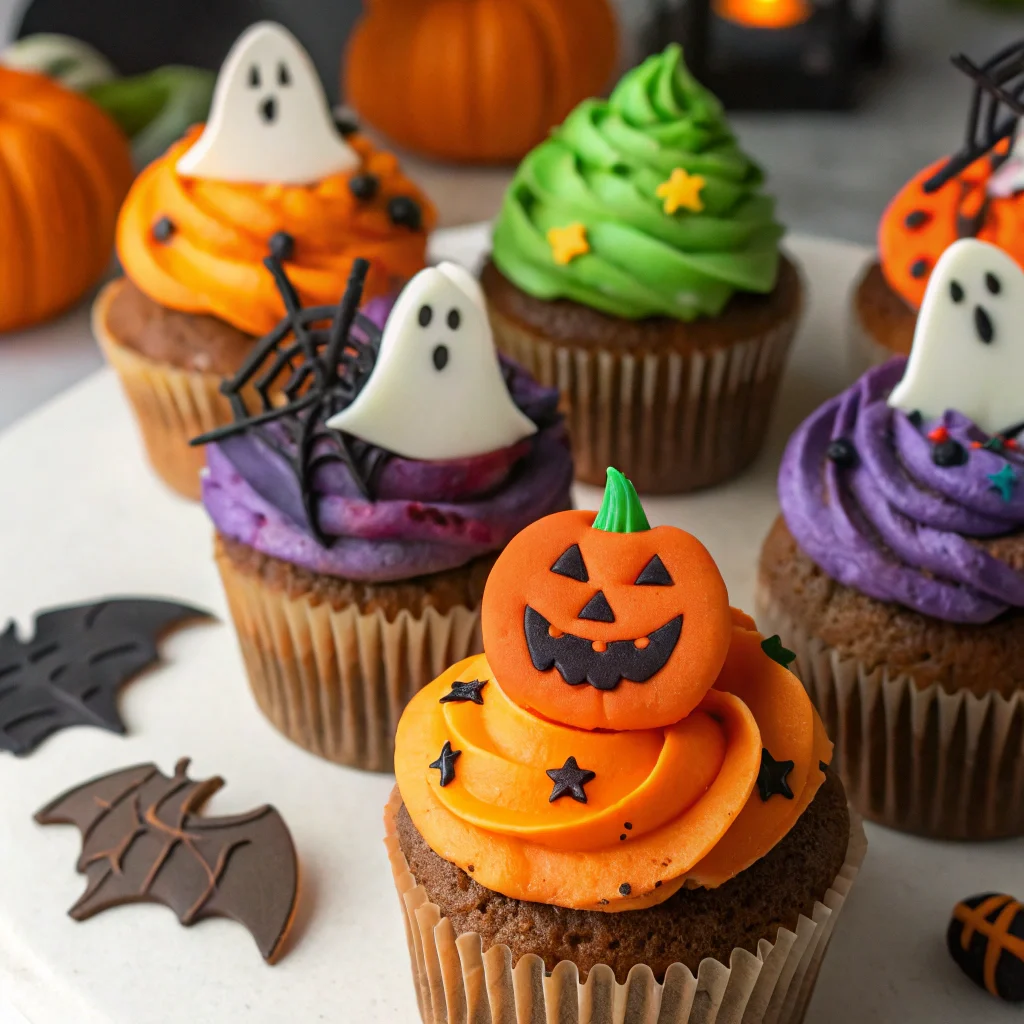
Step-by-Step Instructions
- Color your frosting.
Divide your buttercream into three bowls. Tint one orange, one black, and leave one white. Use gel food coloring for vibrant colors that won’t water down your frosting.This is the most important step to make your decorate halloween cupcakes pop.
- Frost a base layer. Using an offset spatula or a butter knife, spread a smooth, thin layer of your chosen color on each cupcake. This is your canvas.
Don’t worry about it being perfect; the decorations will cover most of it.
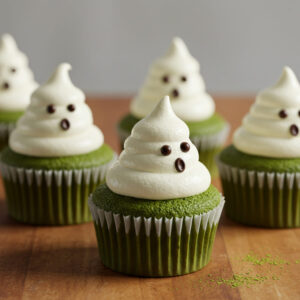
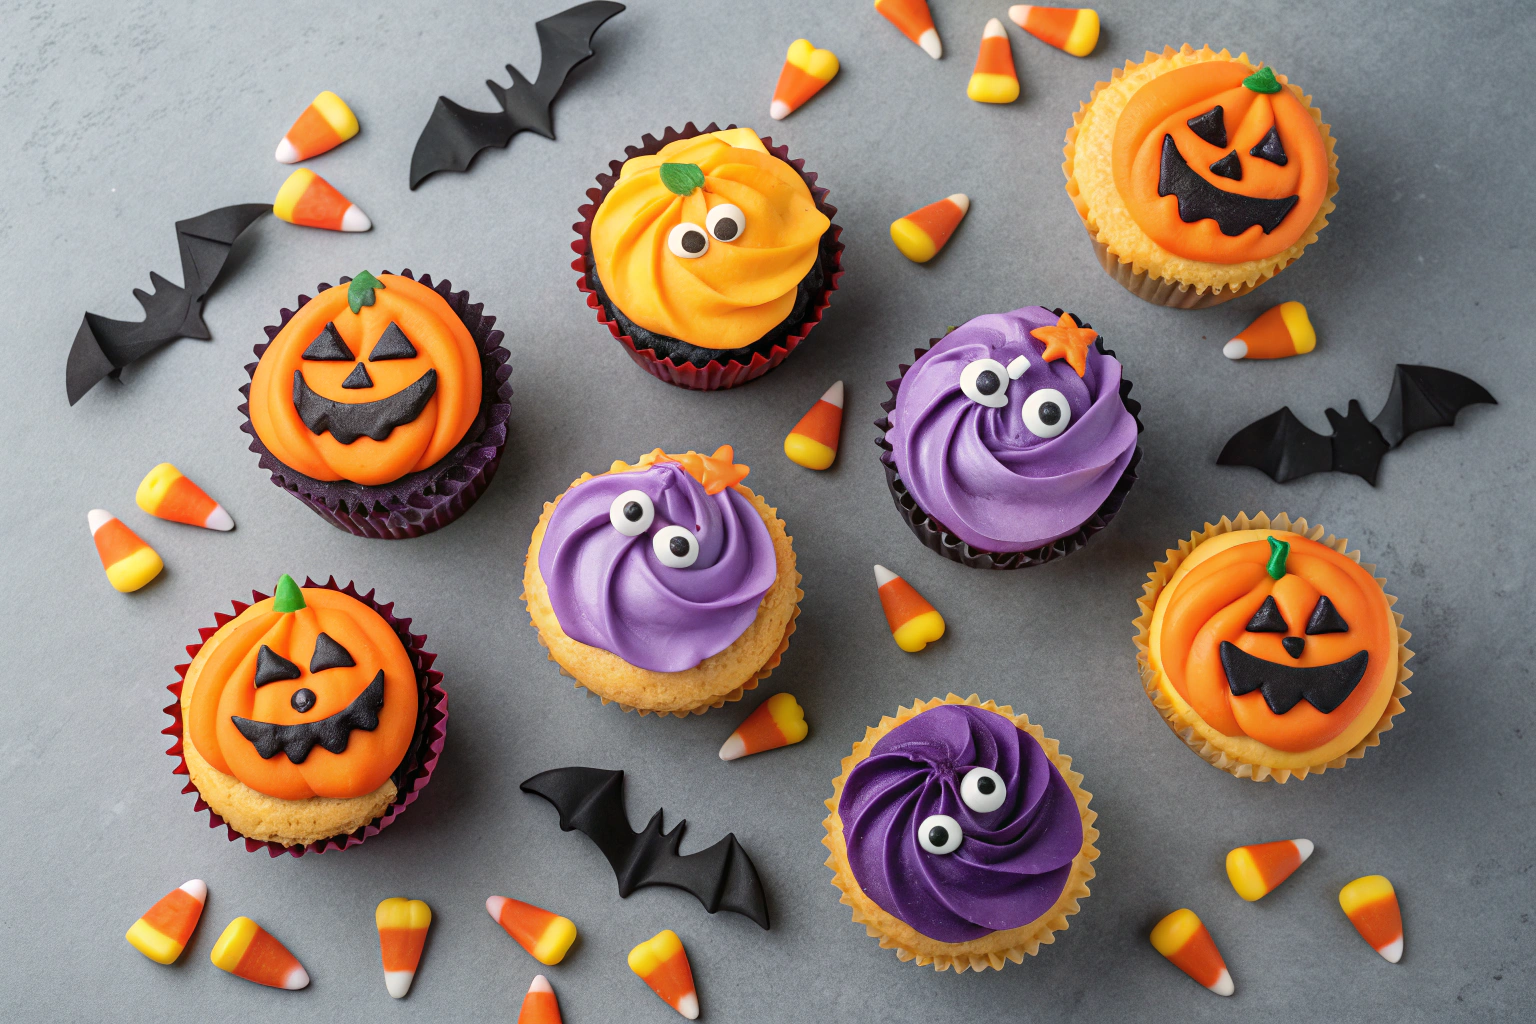
- Create your spooky characters. For ghosts, plop a dollop of white frosting and pull up to make a point. For pumpkins, use a star tip to pipe orange swirls.
Press a green sprinkle on top for the stem. This is where the fun begins.
- Add the details with candy. This is the secret weapon.
Press candy eyeballs onto ghosts. Split Oreos for spider bodies and use pretzel sticks for legs. The black icing tube is perfect for drawing spiderwebs or silly faces.Let your kids go wild here.
- Finish with sprinkles. A light shower of black and orange sprinkles ties everything together. It hides any mistakes and adds a professional, festive touch to your decorated Halloween cupcakes.
Storage Instructions
If you have leftovers (a miracle), storage is easy.
Place them in a single layer in an airtight container. They will stay fresh at room temperature for up to 2 days. For longer storage, pop them in the fridge for up to 5 days.
Let them come to room temperature before serving for the best texture. You can also freeze unfrosted cupcakes for up to 3 months. IMO, baking the cupcakes a week ahead is a huge time-saver.
Why You’ll Love This decorate halloween cupcakes
- Impossible to Mess Up: The designs are intentionally simple and forgiving.
If a ghost looks weird, just call it a friendly blob monster.
- Major Crowd-Pleaser: Kids lose their minds over these, and adults appreciate the homemade effort. They are the star of any Halloween party.
- Super Customizable: Allergic to nuts? Use sunflower butter.
Vegan? Use plant-based cupcakes and frosting. This guide to decorate Halloween cupcakes works for any diet.
Common Mistakes to Avoid
- Using warm cupcakes. Your frosting will melt into a puddle of sadness.
Patience is a virtue.
- Skimping on gel food coloring. Liquid food coloring makes frosting runny and gives you pastel, not spooky, colors.
- Overcomplicating the designs. You’re not on a reality baking show. Simple, recognizable shapes are always more effective.
Alternatives and Variations
Don’t feel locked in! If you’re gluten-free, use your favorite gluten-free cupcake mix.
For a vegan version, a simple swap to dairy-free butter and milk works perfectly. Not a fan of buttercream? Cream cheese frosting is a delicious alternative.
You can also theme your cupcakes around specific monsters or use different colored frostings for a whole graveyard scene.
FAQs
Can I freeze the decorated cupcakes?
I don’t recommend it. The frosting can become sticky and the candy decorations might bleed color. It’s best to freeze the cupcakes naked and decorate them the day of your event.
What’s the best substitute for candy eyeballs?
If you can’t find them, you can use mini chocolate chips (pointy side down) or even small dots of black frosting.
They won’t be as perfectly round, but they’ll still be adorable.
How long do the decorated cupcakes stay fresh?
When stored properly in an airtight container, they are best enjoyed within 2 days. The cupcakes will start to dry out after that, though they’ll still be edible.
Is this project kid-friendly?
Absolutely! This is a fantastic activity to do with children.
They can handle adding the sprinkles, placing the eyeballs, and assembling the spiders. It’s messy, fun, and the results will make them so proud.
Can I prep the components ahead of time?
Yes! This is a huge time-saver.
Bake and freeze the cupcakes up to a month ahead. You can also make the frosting and store it in the fridge for a week. Color it the day you plan to decorate your Halloween cupcakes.
Final Thoughts
Learning how to decorate Halloween cupcakes should be fun, not stressful.
With these simple techniques, you’ll create impressive treats that are full of personality. So grab your sprinkles, embrace the mess, and get ready to impress everyone. I can’t wait to see what you create!
Tag me on social media or leave a comment below with your spooky masterpieces.

Ben is a 41-year-old baking educator and former bakery owner from Kansas City, Missouri. With a culinary degree and years of hands-on experience, he specializes in teaching approachable, science-based baking. He once recreated a 17th-century cupcake recipe for a historical food documentary.