Table of Contents
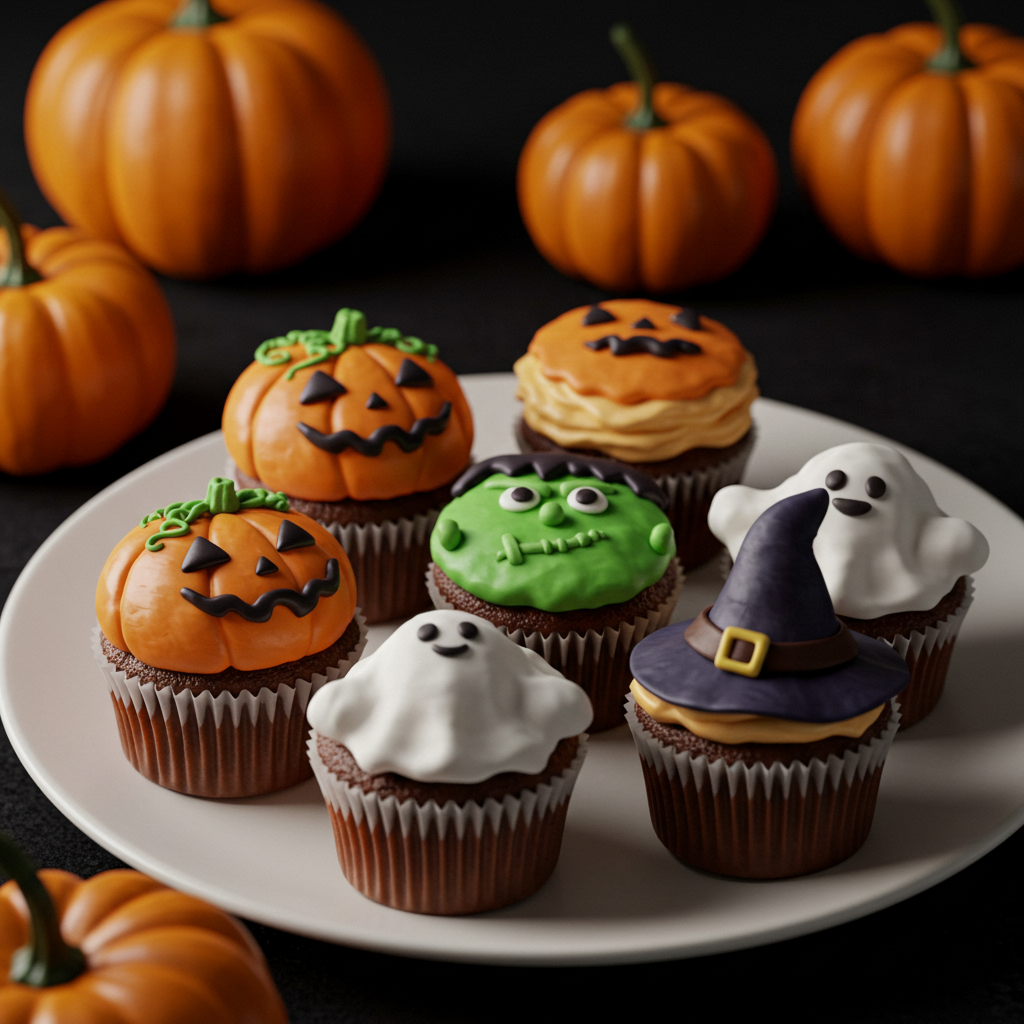
I used to think Halloween baking was a competitive sport for Pinterest moms with too much time on their hands. Then I realized the secret weapon isn’t a culinary degree; it’s a damn good, easy recipe that makes you look like a pastry wizard. These Halloween character cupcakes are my ultimate hack.
They’re the perfect blend of spooky and adorable, guaranteed to be the star of any party spread. Forget spending hours on intricate details that nobody appreciates. This is about maximum impact with minimal, hilarious effort.
I’m talking about cupcakes that get a genuine gasp, not a polite nod. Let’s make some magic.
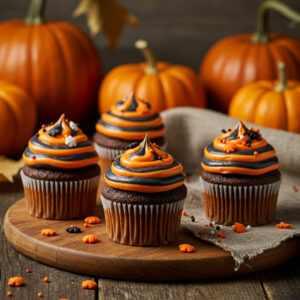
What’s the point of a Halloween cupcake if it doesn’t have personality? These aren’t just chocolate cakes with orange frosting.
Each one has its own little character, its own story. You get to create a whole cast of creepy-cute creatures that actually taste incredible. The base is a moist, deeply chocolatey cupcake that’s nostalgic and comforting.
The frosting is a silky vanilla canvas for your edible art. It’s the combination of a flawless, reliable recipe and the creative freedom to go wild that makes these Halloween character cupcakes so special. Who knew a cupcake could have so much swagger?
The Secret is in the Simplicity
I’ve seen recipes that require a toolkit of specialized piping tips and food-grade paintbrushes.
Hard pass. Our approach uses simple candies, a few strategic snips, and a lot of imagination. The magic is in how ordinary items like Oreos, candy eyes, and pretzel sticks transform into something extraordinary.
It’s edible engineering for the rest of us. This process is half the fun, especially if you have kids helping. You’re not just baking; you’re building a squad of edible monsters.
Ingredients
Gather your squad.
This is where the fun begins. We’re using a from-scratch cupcake base because, IMO, it makes a world of difference in flavor and texture. But the real stars are the decorating components that bring our Halloween character cupcakes to life.
Don’t be intimidated by the decoration list; it’s mostly candy you can find in any grocery store aisle.
- For the Chocolate Cupcakes: All-purpose flour, granulated sugar, unsweetened cocoa powder, baking soda, salt, large egg, buttermilk, vegetable oil, vanilla extract, hot coffee (trust me, it works).
- For the Vanilla Frosting: Unsalted butter, powdered sugar, heavy cream, vanilla extract, a pinch of salt.
- For the Spooky Decorations: Oreo cookies, green candy melts, candy eyes, black decorating gel, orange sprinkles, small pretzel sticks, black licorice laces. This is your character creation kit!
Step-by-Step Instructions
- Make the cupcake batter. Whisk your dry ingredients together in one bowl and your wet ingredients (except the coffee) in another.
Combine them, then slowly stream in the hot coffee. The batter will be thin, but this is the secret to a supremely moist crumb.
- Bake to perfection. Divide the batter evenly among lined muffin cups, filling each about two-thirds full.
Bake at 350°F for 18-20 minutes. A toothpick inserted should come out with a few moist crumbs. Let them cool completely.I mean it. Frosting a warm cupcake is a recipe for a puddle of sadness.
- Whip up the frosting. Beat the softened butter until it’s pale and fluffy.
Gradually add the powdered sugar, then the cream, vanilla, and salt. Beat on high for 2-3 minutes until it’s light and spreadable. This frosting is your edible glue and canvas.
- Unleash your inner artist.
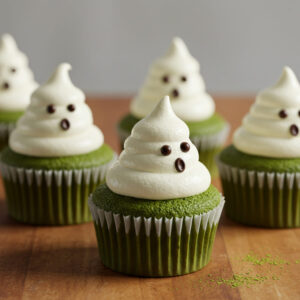
This is where we create our Halloween character cupcakes. Tint some frosting with green gel for monsters. Use an Oreo split in half for bat wings.Get creative with the candy eyes and licorice laces for faces. There are no mistakes here, only unique creations.
Storage Instructions

Your ghoulish masterpieces need a proper home. Because of the frosting, these are best stored properly to maintain their adorable-but-spooky looks.
For short-term storage, place them in a single layer in an airtight container.
They will stay fresh at room temperature for up to 2 days. If your kitchen is warm, I’d recommend the fridge.
For longer storage, you can absolutely freeze them. Place the undecorated, unfrosted cupcakes in a freezer bag for up to 3 months.
Thaw overnight and decorate the day you need them. You can also freeze the decorated cupcakes; just let them sit at room temperature for an hour before serving.
Why You’ll Love This Halloween character cupcakes
- Total Crowd-Pleaser: From sugar-crazed kids to skeptical adults, these cupcakes win over everyone. They are the centerpiece of any Halloween party and disappear faster than a ghost.
- Deceptively Simple: The techniques look impressive but are genuinely easy to execute.
You don’t need to be a professional baker to get professional-looking results.
- Perfect for Family Fun: This is a fantastic activity to do with children. They can handle the decorating while you manage the baking, making it a fun Halloween tradition.
Common Mistakes to Avoid
- Frosting warm cupcakes. This creates a melty, sad mess.
Patience is a virtue, especially in baking.
- Overmixing the batter. Once you add the flour, mix just until combined. Overmixing leads to tough, dense cupcakes, and nobody wants that.
- Using cold, hard butter for the frosting.
Your butter must be at room temperature for a smooth, fluffy frosting. Otherwise, you’ll have a lumpy, gritty situation.
- Going overboard with decoration. Sometimes, less is more.
A few well-placed candy eyes can be more effective than a chaotic candy explosion.
Alternatives and Variations
This recipe is a fantastic base for all sorts of dietary needs and creative twists. Feel free to make it your own!
For a gluten-free version, simply swap the all-purpose flour for a 1:1 gluten-free baking blend. For vegan Halloween character cupcakes, use a flax egg, plant-based milk and yogurt, and vegan butter.
The decorating candies might need to be sourced for strict vegan diets.
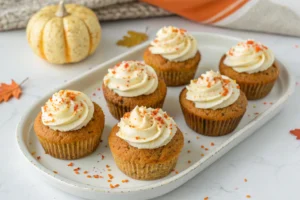
Not a chocolate fan? Use a vanilla or funfetti cupcake base instead. You can also color your frosting with natural food colorings to create a whole different monster palette.
The sky’s the limit!
FAQs
Can I freeze these Halloween character cupcakes?
Absolutely! Freeze them without decoration for best results. You can freeze them decorated, but the candies might get a little weepy upon thawing.
They’ll still taste amazing.
What’s the best substitute for buttermilk?
No buttermilk? No problem. Add 1 tablespoon of white vinegar or lemon juice to a measuring cup, then fill it with milk to the 1-cup line.
Let it sit for 5 minutes until it curdles. Instant buttermilk substitute.
How long do these cupcakes stay fresh?
Stored properly in an airtight container, they are at their best for 2 days at room temperature or up to 5 days in the refrigerator. The cupcakes themselves stay incredibly moist.
Is this recipe kid-friendly?
Extremely.
The baking is simple, but the decorating is where kids truly shine. It’s a fantastic, low-stress activity that lets their creativity run wild. It’s a guaranteed hit for a Halloween party.
Can I prep the components ahead of time?
Yes, this is a great time-saver.
Bake the cupcakes 1-2 days in advance and store them unfrosted. Make the frosting and store it in the fridge, then let it come to room temperature and re-whip before using. You can even pre-separate your decorating candies into little bowls.
Final Thoughts
This recipe for Halloween character cupcakes is your ticket to Halloween baking glory without the stress.
They are fun, flavorful, and foolproof. I can’t wait to see what kind of spooky characters you create in your own kitchen. Tag me on social media or drop a comment below to show off your edible monsters.
Now go make some magic happen!

Kai is a 25-year-old digital artist and baker from Toronto, Canada. Inspired by anime, gaming, and online culture, he transform pixel art and internet trends into edible creations. hes viral cupcake version of the Pokémon world map gained over 3 million views on TikTok.