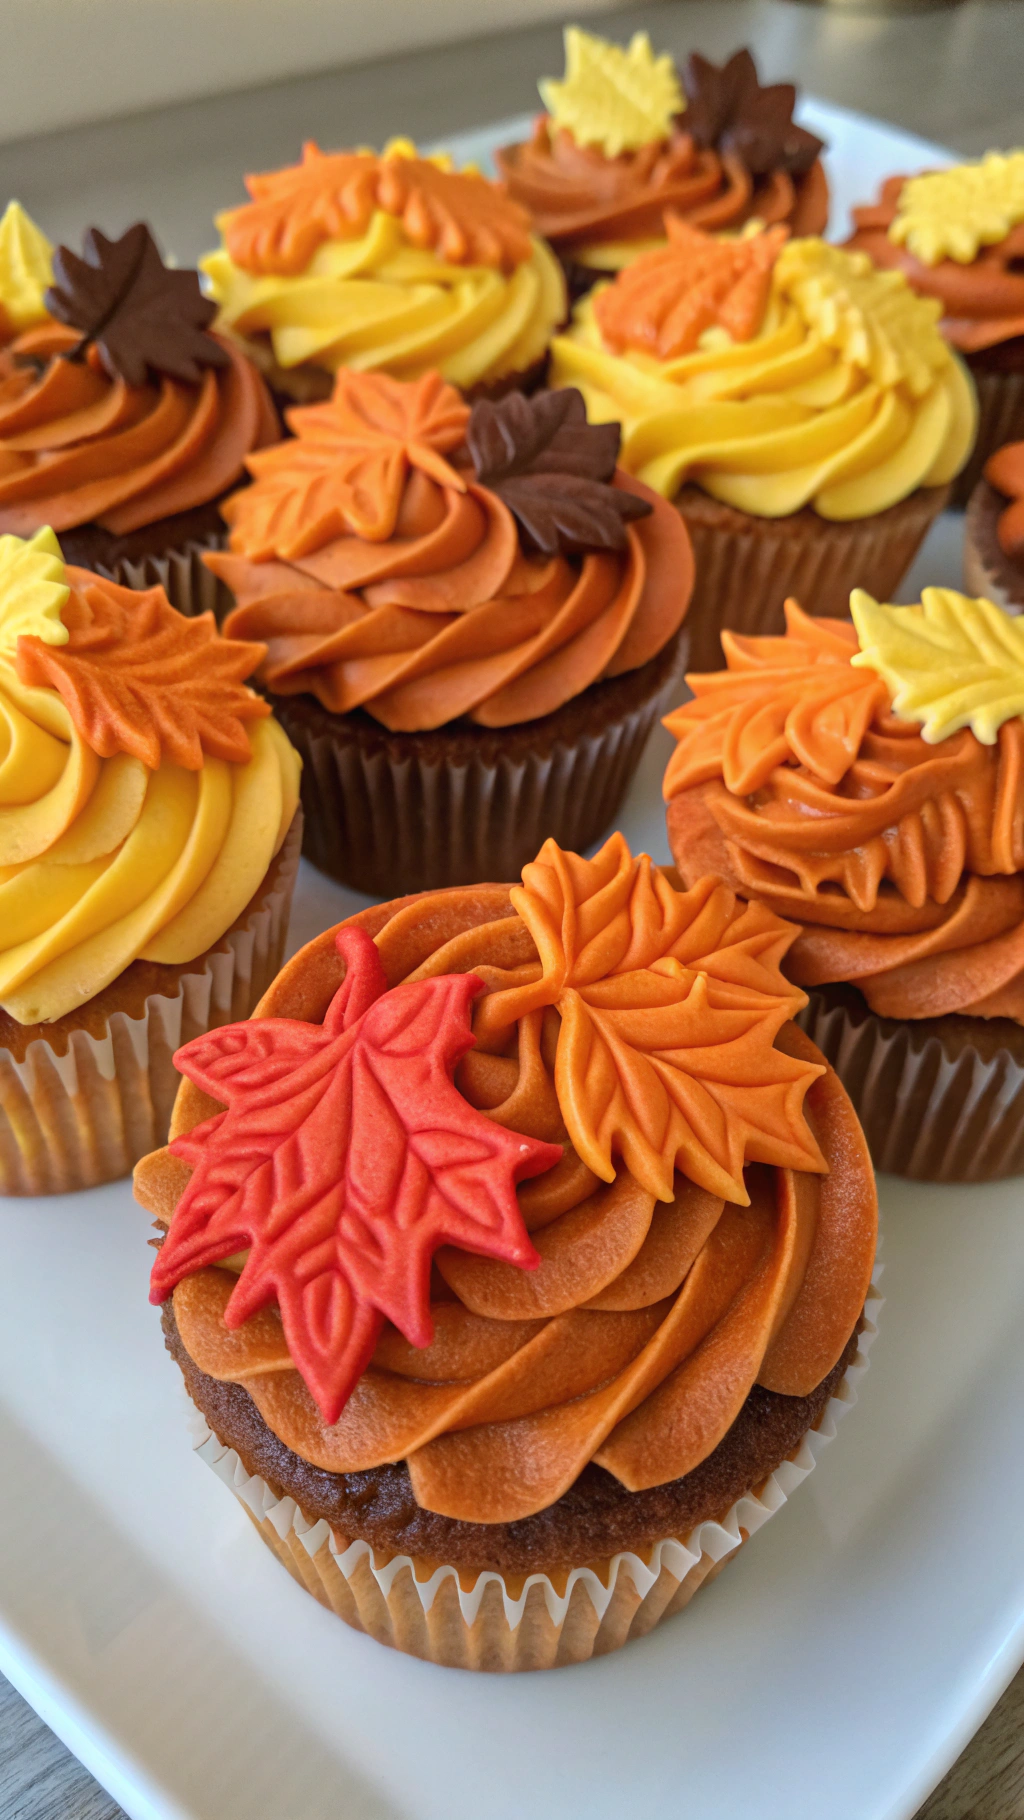
Beautiful Fall Piping Cupcakes Ideas to Try

Table of Contents
I used to think fall baking was all about pumpkin spice everything. Then I discovered the magic of fall piping cupcakes. These aren’t your average sprinkle-and-go desserts.
They’re a full-blown autumn experience in a handheld package. The secret is in the art of the piping. It transforms a simple cupcake into a stunning centerpiece.
I’m talking about edible art that tastes even better than it looks. Forget boring desserts. This is the upgrade your seasonal baking desperately needs.
What’s the big deal, you ask?
It’s the perfect marriage of flavor and flair. The moist, spiced cake is a nostalgic hug from the inside. Then, you get to unleash your inner artist with a piping bag full of decadent frosting.
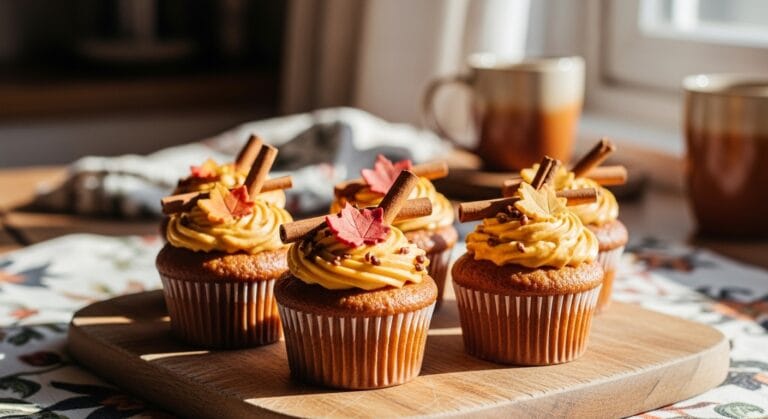
Ever seen a cupcake that looks like a tiny pumpkin or a swirling pile of autumn leaves? That’s the power you hold. It’s not just baking; it’s creating a moment.
These fall piping cupcakes make you feel like a professional pastry chef, even if you’re just in your pajamas.
Ingredients
Gathering your ingredients is the first step to cupcake glory. I promise, nothing here is too wild. The key is using real, quality ingredients for the best flavor.
Your spices should smell like autumn itself. Don’t you dare use that sad, flavorless cinnamon from the back of your cabinet.
- For the Cupcakes: All-purpose flour, baking powder, salt, ground cinnamon, ground nutmeg, ground ginger, unsalted butter (room temp!), light brown sugar, eggs, vanilla extract, whole milk.
- For the Frosting: Unsalted butter (seriously, room temp is non-negotiable), powdered sugar, heavy cream, vanilla extract, a pinch of salt, and gel food coloring in orange, yellow, and brown.
Step-by-Step Instructions
- Preheat your oven and line your pan. Get your oven to 350°F (175°C) and line a muffin tin with your favorite cupcake liners. This is your foundation, so don’t skip it unless you enjoy chiseling.
- Whisk the dry ingredients. In a medium bowl, whisk together the flour, baking powder, salt, and spices. This ensures every bite is perfectly spiced and not lumpy. Nobody wants a pocket of pure baking powder.
- Cream the butter and sugar. In a separate bowl, beat the room-temperature butter and brown sugar until it’s light and fluffy. This is where the texture magic happens. It should look pale and delicious.
- Incorporate the wet ingredients. Beat in the eggs one at a time, then mix in the vanilla. Scrape down the bowl to make sure everything is combined. Patience here pays off in a uniform crumb.
- Combine wet and dry mixtures. Alternate adding the flour mixture and the milk to the butter mixture, starting and ending with the flour. Mix until just combined. Overmixing is the enemy of a tender cupcake.
- Bake to perfection. Divide the batter evenly among the liners and bake for 18-20 minutes. A toothpick inserted should come out clean. Let them cool completely before you even think about frosting. IMO, this is the hardest part.
- Make the frosting. While they cool, beat the butter until smooth. Gradually add the powdered sugar, then the cream, vanilla, and salt. Whip it until it’s light and airy. This is your edible clay for your fall piping cupcakes art.
- Color and pipe! Divide the frosting and color it with gel food coloring. Load up your piping bags with different tips and go to town. A star tip is your best friend for easy, gorgeous swirls.
Storage Instructions
If you have any leftovers (a big “if”), you’ll need to store them properly.
Frosted cupcakes can be kept in an airtight container at room temperature for a day. For longer storage, the fridge is your friend. They’ll stay fresh for up to 3 days refrigerated.
You can also freeze them for a future you who will be very grateful. Place them in a single layer on a baking sheet to freeze solid, then transfer to a freezer bag for up to 3 months. Thaw in the fridge overnight.
Why You’ll Love This fall piping cupcakes
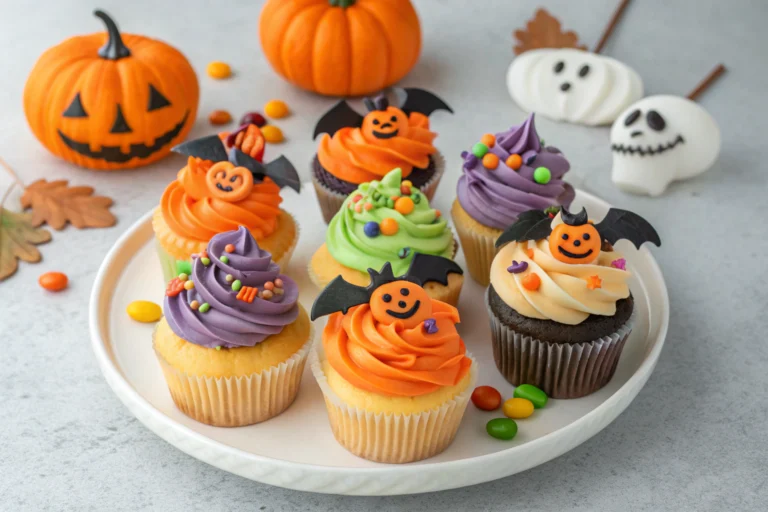
- Total Crowd-Pleaser: These aren’t just cupcakes; they’re a conversation starter. They impress at every fall gathering, from Halloween parties to Thanksgiving dessert tables.
- Surprisingly Simple: The process is straightforward, but the piping makes it look like you slaved for hours. It’s the ultimate culinary illusion for maximum credit.
- Endlessly Customizable: Change the spices, the frosting flavors, or the piping designs. You can make a whole batch look different. It’s a creative outlet you can eat.
Common Mistakes to Avoid
- Using cold butter. Your frosting will be lumpy and your cake dense. Just plan ahead, people.
- Overmixing the batter. You’re developing gluten, which leads to tough cupcakes. Mix until just combined and walk away.
- Frosting warm cupcakes. This is a tragedy in the making. The frosting will melt into a sad, soupy puddle. Wait for them to cool completely.
- Using liquid food coloring. This will thin out your beautiful, thick frosting and ruin your piping efforts. Gel coloring is the only way.
Alternatives and Variations
This recipe is a fantastic base for experimentation. For a dairy-free version, use plant-based butter and milk. A gluten-free 1-to-1 flour blend works perfectly here.
You can swap the spices for a chai spice blend or add a tablespoon of espresso powder to the batter for a deeper flavor. Not a fan of vanilla buttercream? Try a cream cheese frosting or a maple cinnamon buttercream instead.
FAQs
Can I freeze these fall piping cupcakes?
Absolutely!
Freeze them unfrosted for the best texture. Once they are completely cool, seal them in a freezer-safe bag or container. You can also freeze frosted cupcakes, but the decoration might get slightly damaged during thawing.
What’s the best substitute for heavy cream in the frosting?
For a lighter option, full-fat coconut cream (chilled) can work.
For a dairy-free version, use a plant-based heavy cream alternative. Do not use milk, as it won’t provide the necessary stability for piping these beautiful fall piping cupcakes.
How long do they stay fresh?
Stored in an airtight container at room temperature, they are best within 24 hours. In the fridge, they’ll maintain quality for about 3 days.
Let them come to room temperature for about 30 minutes before serving for the best flavor and texture.
Is this recipe kid-friendly?
Incredibly! Kids love helping with the mixing and, most of all, the decorating. The piping step is a fun activity.
It’s a great way to get them involved in the kitchen and create some fun family memories.
Can I prep the batter ahead of time?
You can! Mix the batter, cover the bowl, and refrigerate it for up to 24 hours. When you’re ready, let it sit at room temperature for 30 minutes, give it a gentle stir, then portion and bake.
FYI, the frosting can also be made a day ahead.
Final Thoughts
This recipe for fall piping cupcakes is your ticket to becoming the baking hero of the season. It’s fun, flavorful, and far more impressive than its effort level suggests. I guarantee your friends will be asking for the recipe.
Don’t be shy about showing off your creations. Now go make some magic, and tell me all about your piping triumphs in the comments below!

Ben is a 41-year-old baking educator and former bakery owner from Kansas City, Missouri. With a culinary degree and years of hands-on experience, he specializes in teaching approachable, science-based baking. He once recreated a 17th-century cupcake recipe for a historical food documentary.

3 Comments