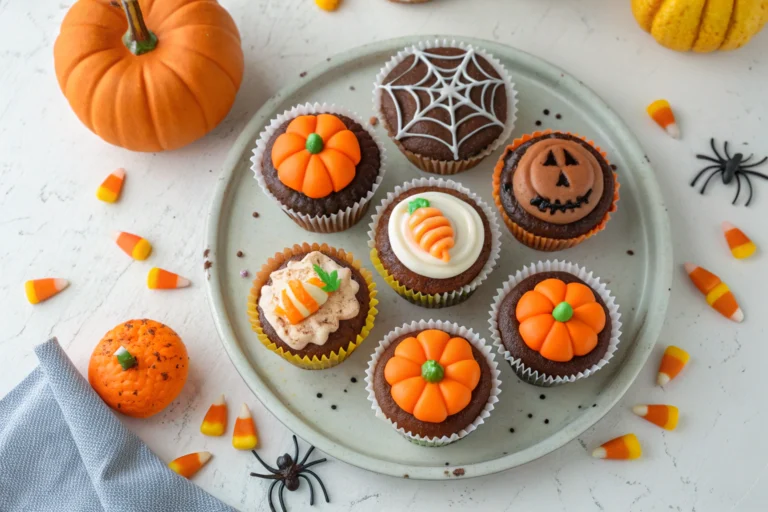
Irresistible Gluten Free Red Velvet Cupcake Perfection
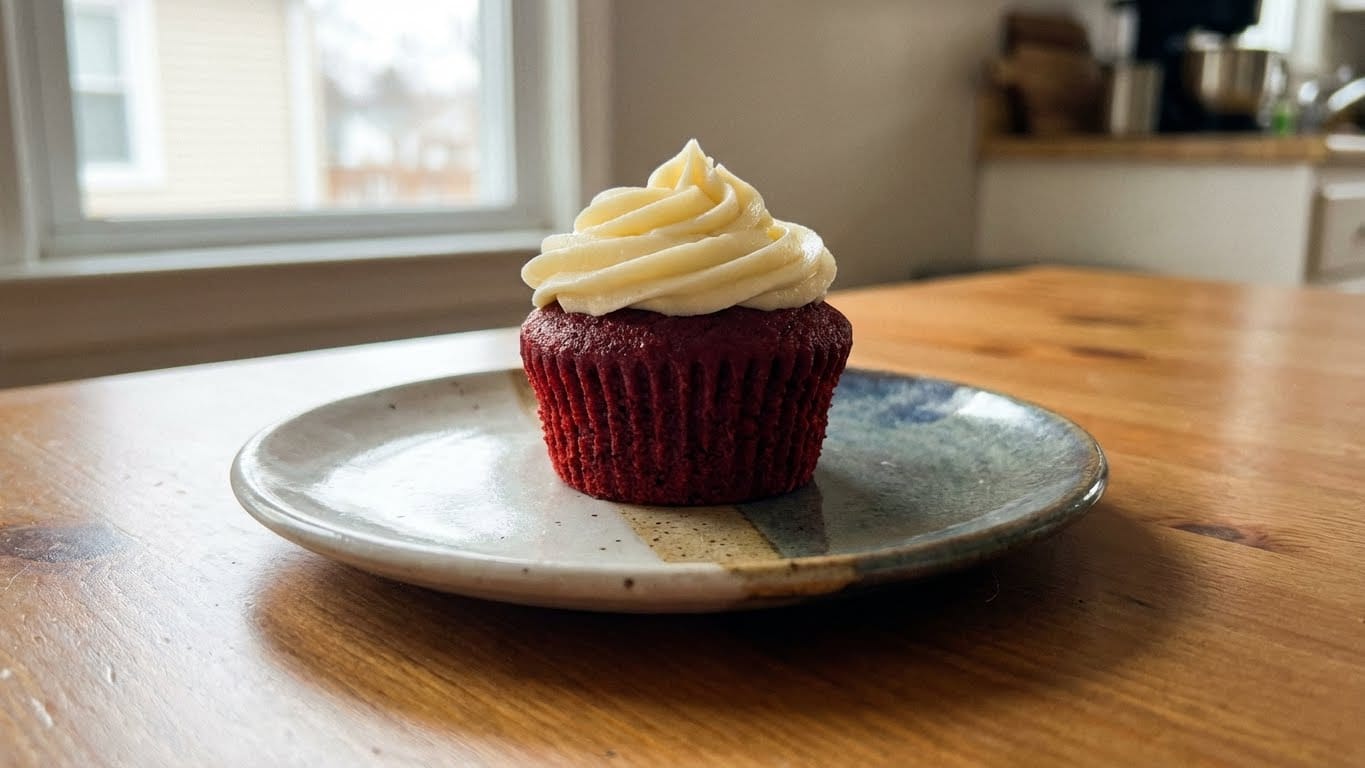
Table of Contents
The Ultimate Guide to the Perfect Gluten Free Red Velvet Cupcake
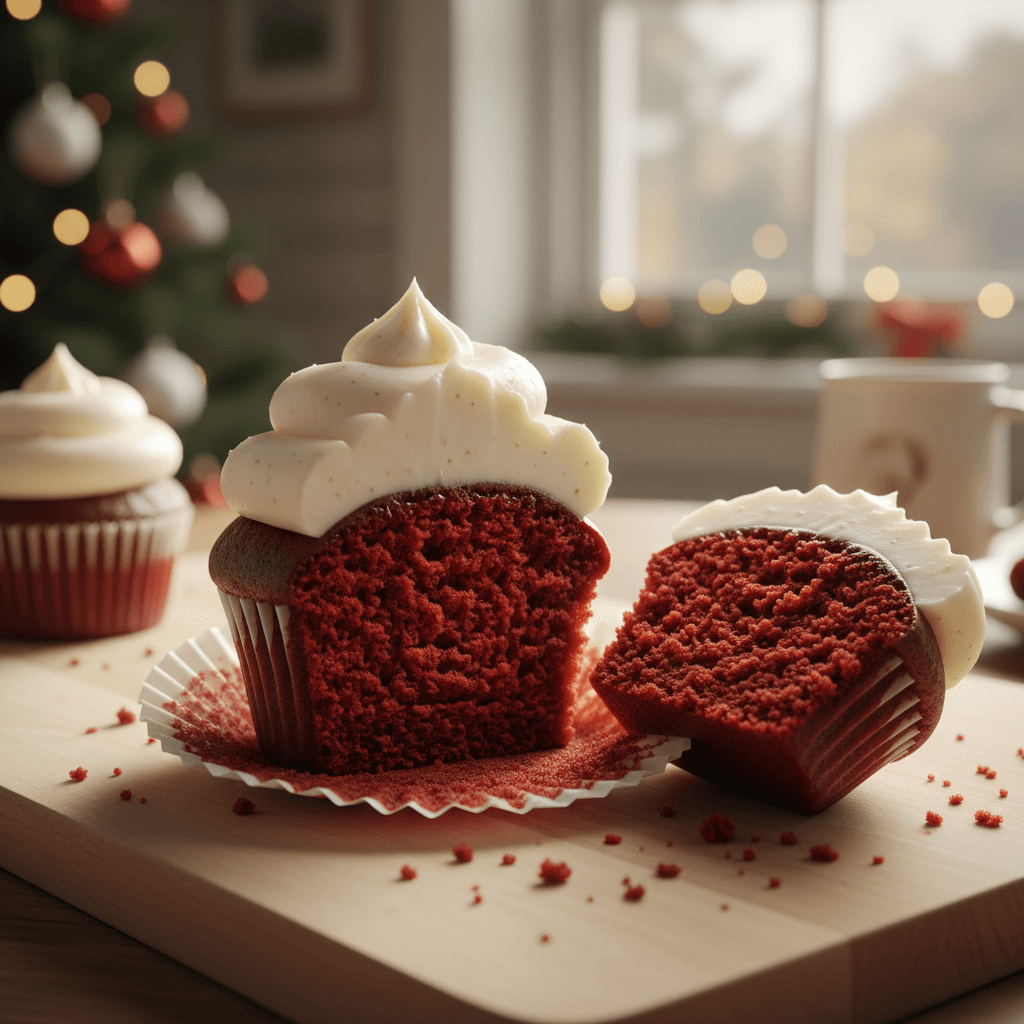
Craving that iconic, velvety dessert but need a safe alternative? Your search ends with the perfect gluten free red velvet cupcake. This classic treat, with its signature crimson hue and tangy cream cheese frosting, is now accessible to everyone. I remember the first time I nailed this recipe. The look on my friend’s face, who thought she’d never enjoy one again, was pure magic. Let’s bake that magic into your kitchen today.
This isn’t just a simple substitution recipe. It’s a masterclass in texture and flavor. We’re going to create a cupcake so good, no one will guess it’s gluten-free. Forget the dry, crumbly versions of the past. This guide delivers moist, tender, and utterly delicious results every single time.
The 5 Secret Weapons for a Flawless Gluten Free Red Velvet Cupcake
What separates a good cupcake from a legendary one? It’s all in the details. Most gluten-free baking fails come from using the wrong flour blend or overmixing the batter. For more ideas, check out our guide on sugar free apple cupcakes,Sugar Free. We’re going to sidestep those pitfalls with some proven strategies.
First, the flour. A store-bought, all-purpose gluten-free blend that includes xanthan gum is your best friend. This mimics the structure gluten usually provides. The science behind gluten’s role in baking is fascinating, but our blend handles the heavy lifting.
Second, buttermilk and vinegar are non-negotiable. They create the signature tang and react with the baking soda for a beautiful rise. Third, use gel food coloring for that vibrant, bakery-style red without adding extra liquid. Fourth, room temperature ingredients are crucial for proper emulsification.
Finally, trust the process. Gluten-free batter can look different. It might be thicker. Don’t panic! For more ideas, check out our guide on cupcake crumb tutorial,Cupcakes. This leads to that perfect, velvety crumb we’re after. Follow these secrets, and you’re guaranteed success.
Ingredients
For the Cupcakes:
- 1 ¼ cups (160g) high-quality gluten-free all-purpose flour blend (with xanthan gum)
- 2 tablespoons unsweetened cocoa powder (not Dutch-processed)
- ½ teaspoon baking soda
- ¼ teaspoon fine sea salt
- ¾ cup (150g) granulated sugar
- ½ cup (120ml) neutral oil (like avocado or canola)
- 1 large egg, room temperature
- 2 teaspoons pure vanilla extract
- ½ cup (120ml) buttermilk, room temperature
- 1 tablespoon liquid red gel food coloring
- 1 teaspoon white vinegar
For the Cream Cheese Frosting:
- 8 oz (225g) full-fat cream cheese, softened
- ½ cup (115g) unsalted butter, softened
- 3 ½ cups (420g) powdered sugar, sifted
- 1 teaspoon pure vanilla extract
- Pinch of salt
Instructions
- Preheat your oven to 350°F (175°C). Line a 12-cup muffin tin with paper liners. In a medium bowl, whisk together the gluten-free flour, cocoa powder, baking soda, and salt. Set this dry mixture aside.
- In a large bowl, combine the granulated sugar and oil. Whisk vigorously for a full minute until well combined. Add the egg and vanilla, whisking again until the mixture is smooth and slightly pale.
- In a small jug, stir together the buttermilk, red food coloring, and vinegar. With your mixer on low, add half of the dry flour mixture to the sugar-oil mixture. Then pour in all of the buttermilk mixture. Finally, add the remaining dry ingredients. Mix just until no dry streaks remain. The batter will be thick.
- Divide the batter evenly among the 12 lined muffin cups, filling each about ⅔ full. Bake for 18-22 minutes. A toothpick inserted into the center should come out clean. Let the cupcakes cool in the pan for 5 minutes, then transfer to a wire rack to cool completely before frosting.
- Make the frosting. Using an electric mixer, beat the softened cream cheese and butter together on medium-high speed until completely smooth and creamy, about 2 minutes. Reduce speed to low and gradually add the sifted powdered sugar. Add the vanilla and salt. Once incorporated, beat on high for 1-2 minutes until fluffy. Frost cooled cupcakes generously.
Storage and Serving Tips
These cupcakes are best enjoyed the day they are made, but they keep wonderfully. Store any frosted leftovers in an airtight container in the refrigerator for up to 3 days. For more ideas, check out our guide on cupcake frosting techniques. The frosting will firm up when cold.
For the best texture and flavor, let them sit at room temperature for about 20 minutes before serving. You can also freeze unfrosted cupcakes for up to 2 months. Wrap them individually in plastic wrap and place in a freezer bag. Thaw at room temperature before frosting.
3 Incredible Benefits of Baking Gluten-Free
Choosing to bake gluten-free isn’t just about dietary necessity. It opens up a world of culinary creativity and inclusive joy. Here are three powerful benefits you’ll experience.
- Inclusive Celebrations: Nothing beats seeing someone enjoy a treat they thought was off-limits. Baking gluten-free means everyone at the table can partake in the celebration, from birthdays to holidays.
- Exploring New Flavors: Gluten-free flours like almond, oat, and sorghum introduce unique, nutty dimensions to baked goods. It’s a fantastic way to expand your palate and baking repertoire beyond traditional wheat.
- Digestive Wellness: For those with sensitivities, gluten-free baking can mean enjoying desserts without discomfort. It aligns with a mindful approach to eating. The National Institute of Diabetes and Digestive and Kidney Diseases provides extensive resources on gluten-related disorders, highlighting the importance of safe food preparation.
5 Common Gluten-Free Baking Mistakes to Avoid
Even seasoned bakers can stumble with gluten-free recipes. Avoid these pitfalls for guaranteed success. For more ideas, check out our guide on decorating fall cupcakes,decorating.
- Using the Wrong Flour: Not all gluten-free flours are created equal. For this recipe, a pre-mixed all-purpose blend designed for baking is essential. Don’t try to make your own blend here.
- Overmixing the Batter: Gluten-free batters don’t have gluten to toughen, but overmixing can lead to a gummy texture. Mix just until the ingredients are combined.
- Baking at the Wrong Temperature: Gluten-free goods often benefit from a slightly lower, slower bake. Don’t crank up the heat to rush things, or you’ll get dry cupcakes.
- Skimping on Binders: If your flour blend doesn’t include xanthan gum, you must add it. It’s the crucial binder that replaces gluten’s structural role.
- Not Letting Ingredients Reach Room Temp: Cold ingredients don’t emulsify well, leading to a dense, uneven crumb. Plan ahead for that perfect texture.
Delicious Variations and Swaps
Want to mix things up? This recipe is wonderfully adaptable. For a dairy-free version, use a plant-based milk mixed with 1 tablespoon of lemon juice instead of buttermilk. Use vegan butter and cream cheese for the frosting.
For a nuttier flavor, you can replace ¼ cup of the gluten-free flour blend with finely ground almond flour. Love chocolate? Fold in ½ cup of gluten-free chocolate chips into the batter. For a holiday twist, add a hint of peppermint extract to the frosting.
Frequently Asked Questions
Find answers to common questions
Final Thoughts
Baking should be a joy, not a source of stress or exclusion. This recipe proves that dietary restrictions don’t mean sacrificing flavor or tradition. With the right techniques, you can create a show-stopping dessert that delights everyone.
I encourage you to give this gluten free red velvet cupcake recipe a try. Share it with friends and family. For more inspiration on gluten-free living and baking, America’s Test Kitchen offers fantastic deep dives into the science of gluten-free baking. Now, preheat that oven and get ready for some seriously delicious, inclusive baking magic!

gluten free red velvet cupcake
Ingredients
- 1 ¼ cups (160g) high-quality gluten-free all-purpose flour blend (with xanthan gum)
- 2 tablespoons unsweetened cocoa powder (not Dutch-processed)
- ½ teaspoon baking soda
- ¼ teaspoon fine sea salt
- ¾ cup (150g) granulated sugar
- ½ cup (120ml) neutral oil (like avocado or canola)
- 1 large egg, room temperature
- 2 teaspoons pure vanilla extract
- ½ cup (120ml) buttermilk, room temperature
- 1 tablespoon liquid red gel food coloring
- 1 teaspoon white vinegar
- 8 oz (225g) full-fat cream cheese, softened
- ½ cup (115g) unsalted butter, softened
- 3 ½ cups (420g) powdered sugar, sifted
- 1 teaspoon pure vanilla extract
- Pinch of salt
Instructions
- Preheat your oven to 350°F (175°C). Line a 12-cup muffin tin with paper liners. In a medium bowl, whisk together the gluten-free flour, cocoa powder, baking soda, and salt. Set this dry mixture aside.
- In a large bowl, combine the granulated sugar and oil. Whisk vigorously for a full minute until well combined. Add the egg and vanilla, whisking again until the mixture is smooth and slightly pale.
- In a small jug, stir together the buttermilk, red food coloring, and vinegar. With your mixer on low, add half of the dry flour mixture to the sugar-oil mixture. Then pour in all of the buttermilk mixture. Finally, add the remaining dry ingredients. Mix just until no dry streaks remain. The batter will be thick.
- Divide the batter evenly among the 12 lined muffin cups, filling each about ⅔ full. Bake for 18-22 minutes. A toothpick inserted into the center should come out clean. Let the cupcakes cool in the pan for 5 minutes, then transfer to a wire rack to cool completely before frosting.
- Make the frosting. Using an electric mixer, beat the softened cream cheese and butter together on medium-high speed until completely smooth and creamy, about 2 minutes. Reduce speed to low and gradually add the sifted powdered sugar. Add the vanilla and salt. Once incorporated, beat on high for 1-2 minutes until fluffy. Frost cooled cupcakes generously.

Sophie is a 33-year-old holistic nutritionist and food scientist living in Portland, Oregon. Growing up in a multicultural home with dietary restrictions, she learned to create desserts that nourish as much as they delight. She’s led wellness retreats focused on clean, mindful baking.


One Comment