Easy Christmas Cupcake Decorating Ideas That Look Amazing
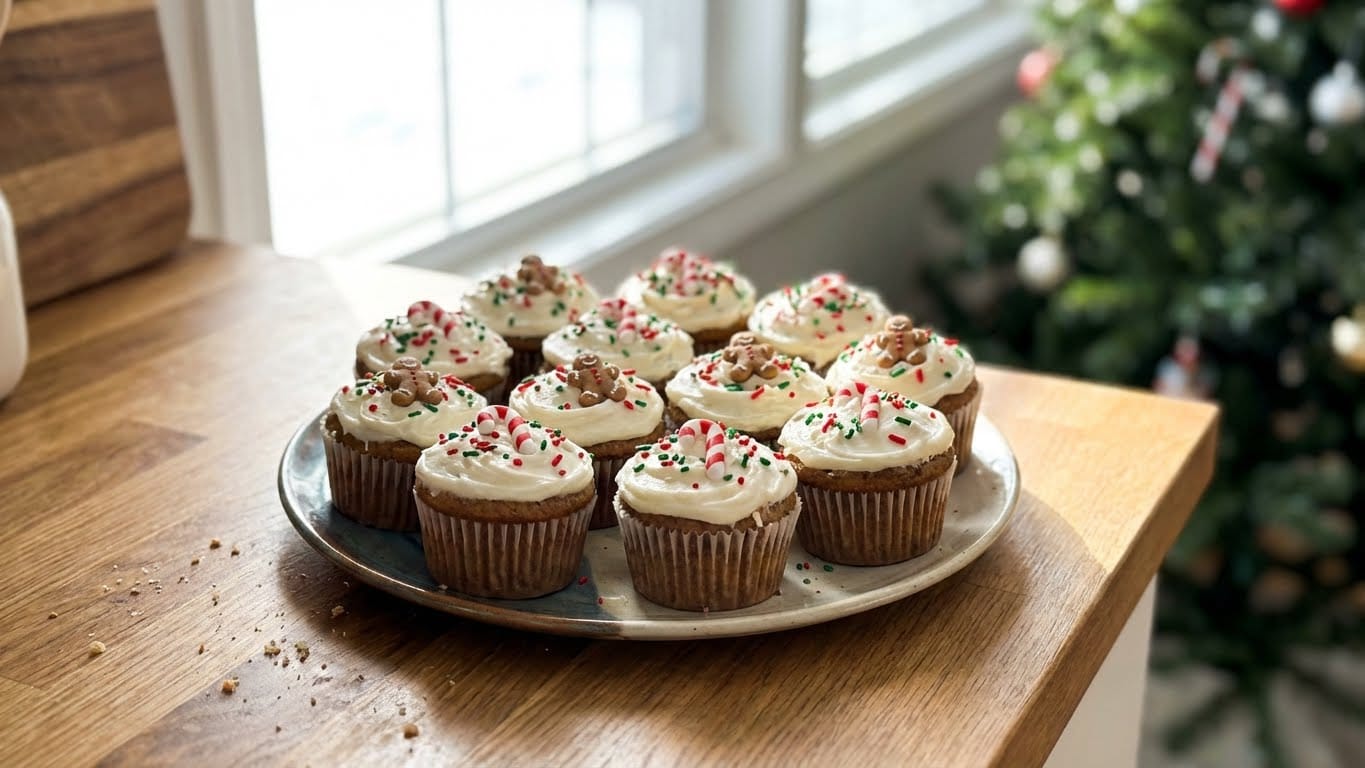
Table of Contents
Looking for easy Christmas cupcake decorating ideas that will wow your guests without the stress? You’ve landed in the right place. The holiday season is magical, but it can also be hectic. I believe baking should be a joy, not a chore. This guide is your secret weapon for creating festive masterpieces.
We’ll explore simple techniques that look incredibly professional. Forget complicated piping skills or expensive tools. With a few clever tricks, you can transform basic cupcakes into a holiday wonderland. These easy Christmas cupcake decorating ideas are designed for bakers of all levels.
Let’s make this your most delicious and creative holiday yet.
7 Pro Techniques for Effortless Holiday Magic
Mastering a few key methods unlocks a world of creativity. The secret isn’t talent, but knowing the right shortcuts. For more ideas, check out our guide on swirl frosting cupcakes. I learned this after a frosting disaster that looked more like a snow monster than Santa.
These proven strategies focus on visual impact with minimal effort. We’ll use simple toppings, clever arrangements, and smart tools. The goal is maximum festive flair with minimum fuss. Your kitchen will feel like a professional bakery.
Understanding basic confectionery principles helps. It’s about color, texture, and playful themes. Think of your cupcake as a tiny, edible canvas. Even a single well-placed candy cane can tell a story.
Ready to discover the techniques that make decorating a breeze? These easy Christmas cupcake decorating ideas are about to become your new tradition. For more ideas, check out our guide on Christmas Cupcake Ideas,Christmas.
Ingredients
Gathering your supplies is the first step to success. You likely have many of these items already. The beauty of these ideas is their simplicity.
- One batch of baked cupcakes (chocolate, vanilla, or gingerbread work perfectly)
- Vanilla or cream cheese frosting (store-bought is totally fine!)
- Green and red gel food coloring
- Small offset spatula or butter knife
- Piping bag with a star tip (optional, but great for trees)
- Assorted holiday sprinkles (snowflakes, red/green nonpareils, sugar pearls)
- Mini candy canes, pretzel sticks, and marshmallows
- Chocolate chips or M&M’s for eyes and buttons
- Shredded coconut (for snow)
- Edible glitter or gold dust (for that extra sparkle)
Instructions
Follow these steps to create a stunning holiday dessert table. Each technique builds on simple skills. Feel free to mix and match based on your time and mood.
- Ensure your cupcakes are completely cool before you start. Warm cupcakes will melt your frosting into a sad puddle. This is the most crucial step for clean decorating.
- Prepare your frosting base. Divide vanilla frosting into separate bowls if using colors. Use gel food coloring for vibrant, holiday-red and forest-green hues without thinning the frosting.
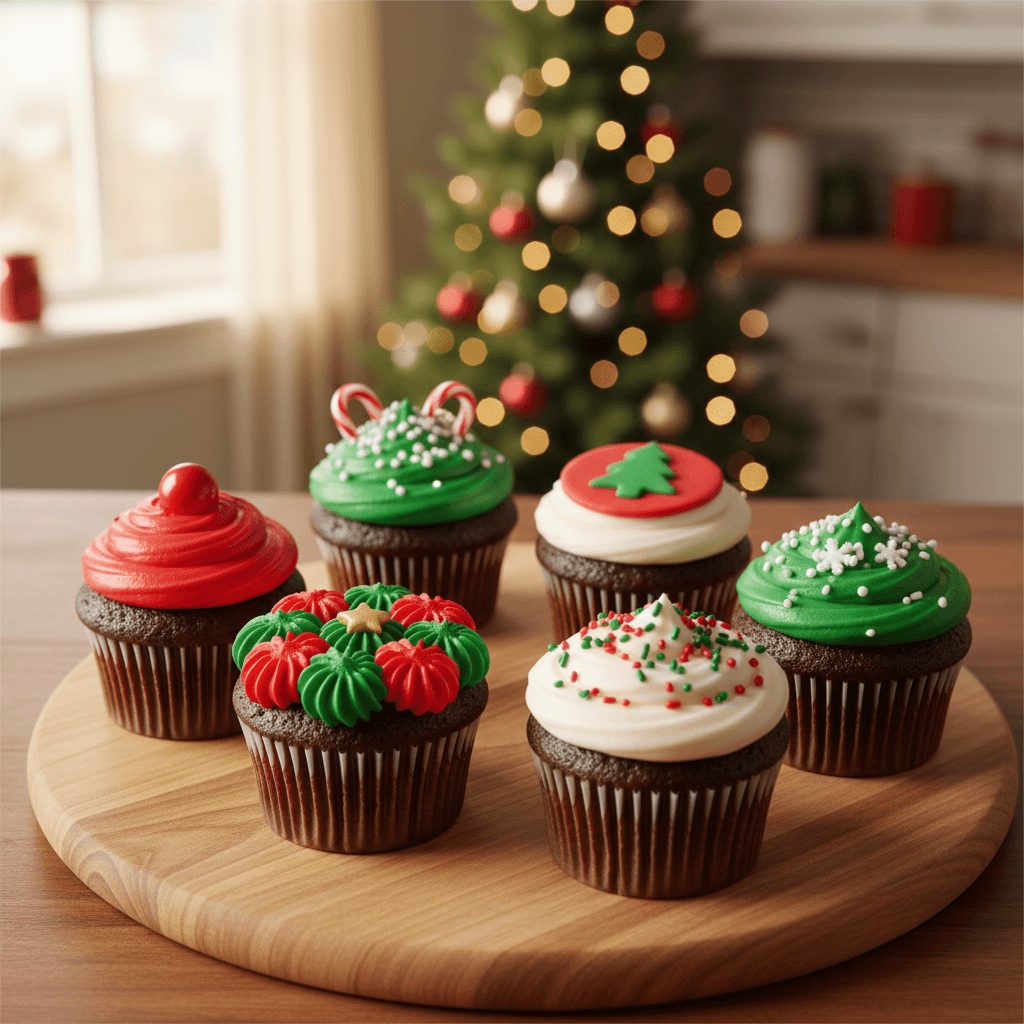
- For the classic Christmas tree, fit a piping bag with a star tip. Fill it with green frosting. Pipe a spiral from the outside edge to the center, building height. Top with a yellow candy star or a sprinkle.
- Create a simple snowman by piling three mini marshmallows with a dab of frosting. Use chocolate chips for eyes and buttons. A sliver of orange candy makes a perfect carrot nose.
- Make adorable reindeer faces. Frost the cupcake smoothly with chocolate frosting. Add pretzel stick antlers. Use red M&M’s for the nose and candy eyes or more chocolate chips.
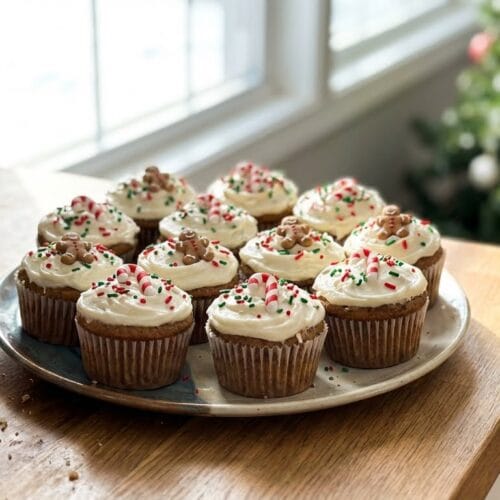
- For a winter wonderland, frost with white icing. Gently press shredded coconut onto the top for snow. Add a few blue sugar pearls and a dusting of edible glitter.
- Let your decorated cupcakes set for about 15 minutes before serving. This allows the frosting to crust slightly, keeping your designs picture-perfect.
Storage and Serving Tips
Keeping your creations fresh ensures they taste as good as they look. Frosted cupcakes are best stored in a single layer. For more ideas, check out our guide on Cupcakes for Celebrations,Cupcakes. Use a large, airtight container to prevent drying out.
They will stay fresh at room temperature for up to two days. If your kitchen is very warm, consider refrigerating them. Bring them back to room temperature for about 30 minutes before serving for the best texture.
Pro Tip: For advance prep, bake and freeze unfrosted cupcakes. Thaw overnight, then decorate the day of your event. This spreads out the work and reduces last-minute panic.
5 Incredible Benefits of Homemade Holiday Treats
Why go through the effort when store shelves are packed with options? The rewards go far beyond the final product. Homemade baking creates lasting memories and offers unique advantages.
- Unmatched Freshness & Flavor: Nothing beats the taste of a cupcake baked and decorated with love hours before serving. The quality is immediately noticeable.
- Total Customization: You control the ingredients. Need nut-free or want less sugar? You can easily adapt recipes to suit dietary needs and personal preferences.
- A Magical Family Activity: Decorating cupcakes is a fantastic way to engage kids in the kitchen. It fosters creativity and becomes a cherished holiday tradition.
- Significant Cost Savings: A batch of homemade cupcakes costs a fraction of boutique bakery prices. You can create a stunning display for the cost of a few specialty ingredients.
- The Joy of Giving: A box of personally decorated treats is a heartfelt gift for neighbors, teachers, or coworkers. It shows thoughtfulness and care that a store-bought item simply can’t match.
The act of creating something beautiful and delicious is a wonderful mindfulness practice during a busy season. These easy Christmas cupcake decorating ideas are a gateway to that experience.
Common Decorating Mistakes to Avoid
Even simple projects have pitfalls. Awareness is your best defense. Let’s sidestep common errors so your baking session stays joyful.
- Using Liquid Food Coloring: This can thin your frosting, making it runny and unable to hold shape. Always opt for concentrated gel or paste colors.
- Decorating Warm Cupcakes: I mentioned it before, but it’s worth repeating. Patience here prevents a melted, messy disaster.
- Overcomplicating the Design: Start with one or two elements per cupcake. A clean, simple design often looks more elegant than a crowded one.
- Skipping the Crumb Coat: For a super smooth frosting base, apply a thin “crumb coat” first. Chill for 10 minutes, then add your final, thicker layer of frosting.
- Forgetting the Theme: Stick to a cohesive color palette or character set. A mix of snowmen, trees, and reindeer looks charmingly coordinated.
Brilliant Alternatives and Variations
Don’t have every item on the ingredient list? No problem! Baking is about improvisation. Use what you have to create something wonderful.
Instead of piping bags, use a zip-top bag with a corner snipped off. No candy canes? Use broken pretzel pieces for reindeer antlers. Fresh berries like raspberries make perfect Santa hats or Rudolph noses.
For a dairy-free option, use vegan butter and plant-based milk in your frosting. Gluten-free flour blends work wonderfully in most cupcake recipes. The decorating ideas remain the same.
Consider flavor variations too. Add a drop of peppermint extract to your frosting. Or mix crushed candy canes into the batter for a festive crunch. For more ideas, check out our guide on Ghost Whip Frosting Tutorial,Frosting,Ghost. These easy Christmas cupcake decorating ideas are wonderfully adaptable.
Frequently Asked Questions
Find answers to common questions
Final Thoughts
I hope these easy Christmas cupcake decorating ideas fill your kitchen with laughter and your table with beauty. Remember, perfection is not the goal. The goal is joy, creativity, and deliciousness shared with loved ones.
Each sprinkle placed is a moment of holiday spirit. Your effort is what makes these treats special. For more inspiration on holiday baking traditions and their origins, explore this resource from the Smithsonian. Now, go preheat that oven and have fun. Your delicious, festive masterpieces await.
easy Christmas cupcake decorating ideas
Ingredients
- 24 baked and cooled vanilla or chocolate cupcakes
- 2-3 cans of vanilla or cream cheese frosting (whipped)
- Green and red gel food coloring
- Small piping bags or zip-top bags
- Wilton 1M or 2D piping tip (for swirls)
- Assorted sprinkles (red, green, white, gold)
- Mini pretzel sticks
- Orange sprinkles or orange frosting tube
- Small red candies (like M&Ms or Red Hots)
- Shredded coconut (optional, for snow)
- Edible glitter or pearl dust (optional)
Instructions
- Prep Your Frosting: Divide your whipped frosting into separate bowls. Tint one portion green and one red using gel food coloring. Keep one portion white. Gel color is more vibrant and won’t thin your frosting.
- Create Classic Swirls: Fit a piping bag with a star tip and fill with green frosting. Hold the bag perpendicular to the cupcake center. Pipe a tight spiral outward, then pull up to create a peak. Top with red sprinkle “berries.”
- Make Simple Snowmen: For each, pipe two stacked white frosting mounds. Use a mini pretzel stick for arms. Add two small black sprinkles for eyes and an orange sprinkle for the nose. A red candy makes a perfect button.
- Design Festive Wreaths: Pipe a circle of green frosting using a round tip or a cut bag corner. Leave the center bare. Immediately press green sprinkles onto the frosting ring. Add three small red candies as a bow.
- Finish with Sparkle: For a universal festive touch, lightly dust any frosted cupcake with edible glitter. This instantly elevates even the simplest swirl. It’s my go-to pro tip for maximum visual impact.

Ben is a 41-year-old baking educator and former bakery owner from Kansas City, Missouri. With a culinary degree and years of hands-on experience, he specializes in teaching approachable, science-based baking. He once recreated a 17th-century cupcake recipe for a historical food documentary.